MirageOS Unikernels
MirageOS unikernels are written in OCaml and can be run directly on top of Muen
via the Solo5 platform. Support for Muen was
merged into Solo5 with pull-request
#190 and is part of the official Mirage release since version 3.5.0. The port
includes an implementation of muennet, thus networking is supported.
Unikernel Build
MirageOS heavily depends on the OCaml Package Manager (OPAM) as its build system. Follow the installation instructions here to setup OPAM on your system if you intend to compile the examples in this article manually.
Bob & Docker
Muen system images are built using the Bob build tool. We also provide a ready-made Docker image containing all required software to build MirageOS unikernels. See the Building Muen section on how to install bob and setup the Muen recipes.
For building MirageOS unikernels, fetch the muen-mirageos Docker image like so:
$ docker pull ghcr.io/codelabs-ch/muen-mirageos
This container is only used for building unikernels and it is explicitly stated
in this article when commands should be executed inside the muen-mirageos
container.
Running Unikernels
Solo5 comes bundled with simple test cases, most of which can be executed on Muen in QEMU/KVM. For convenience, there is a bob recipe and CI plan to build and execute the "Hello World" unikernel:
$ bob dev x86-qemu-solo5-test-debug
$ ci/run.sh -a output -r x86-qemu-solo5-test-debug
Inspect the vm/serial.out file in the output directory to see the log
messages of the solo5 test unikernel:
Solo5: Console: Muen Channel @ 0xffff00000, size 0x20000, epoch 0x125e490ca
            |      ___|
  __|  _ \  |  _ \ __ \
\__ \ (   | | (   |  ) |
____/\___/ _|\___/____/
Solo5: Bindings version v0.10.0-5-gdabc69f
Solo5: Memory map: 514 MB addressable:
Solo5:   reserved @ (0x0 - 0x1fffff)
Solo5:       text @ (0x200000 - 0x204fff)
Solo5:     rodata @ (0x205000 - 0x206fff)
Solo5:       data @ (0x207000 - 0x20cfff)
Solo5:       heap >= 0x20d000 < stack < 0x2020d000
Solo5: Clock source: Muen PV clock, TSC frequency 2111994000 Hz

**** Solo5 standalone test_hello ****

Hello, World
Command line is: 'Hi!'
Solo5: solo5_exit(0) called
Solo5: Halted
The following bob recipes are of interest to enable Solo5/MirageOS unikernels on Muen:
-
classes/solo5.yaml -
recpipes/devel/solo5.yaml
Using the solo5 class, other unikernels can be enabled to run on Muen/Solo5.
See the Serving Static Website section below on
how to run an externally built unikernel using the provided Docker image.
Serving Static Website
The mirage-skeleton repository
contains example unikernels. One of these examples serves a
static website. The repository
comes checked out in the muen-mirageos Docker container in the correct
version to match mirage. The image also provides a pre-built
static_website_tls unikernel corresponding to the configuration described in
this article. Issue the following commands to use it for a quick test:
$ docker create --name tmp ghcr.io/codelabs-ch/muen-mirageos
$ docker cp tmp:/home/opam/https.muen ./https.muen
If you want to customize the unikernel see below, otherwise skip to section Build System Image.
Customize
The content that will be served can be found in the htdocs directory of the
static_website_tls application. You can replace it with something more
interesting, e.g. an article about your successful adventures with MirageOS and
Muen. Then don’t forget to rebuild the unikernel (see below).
To serve the website from 192.168.254.10 (the configured default), build the
static_website_tls unikernel by issuing the following commands in the
muen-mirageos container:
$ docker run -it -v ${PWD}:/mnt ghcr.io/codelabs-ch/muen-mirageos
$ cd mirage-skeleton/applications/static_website_tls
$ mirage configure -t muen
$ make
If all goes well an unikernel image called https.muen should be present in
the dist directory. Copy this to your host and exit the container:
$ cp dist/https.muen /mnt/
$ exit
To change the IPv4 address and gateway, use the following <bootparams> for
the unikernel subject in the mirage-solo5.xml policy (bob packages
muen::x86-systems-policy-src-solo5*):
<bootparams>--ipv4=192.168.32.3/24 --ipv4-gateway=192.168.32.1</bootparams>Build System Image
Build the unikernel with the following bob command. Set the UNIKERNEL_FILE
variable so it points to the https.muen unikernel binary:
$ bob dev x86-qemu-solo5-debug -DUNIKERNEL_FILE=${PWD}/https.muen
The unikernel serves the website via https on port 4433. Since we are using
QEMU’s host forwarding to expose networking of the emulated system, we must
forward this port by setting the QEMU_NETDEV_EXTRA_OPTS environment variable:
$ export QEMU_NETDEV_EXTRA_OPTS="hostfwd=tcp::4433-192.168.254.10:4433"
| Make sure to use the same IP address that you specified in the mirage configure step if you customized the unikernel. |
Time to run the system using QEMU:
$ contrib/runQemu.py -q x86-qemu-solo5-debug
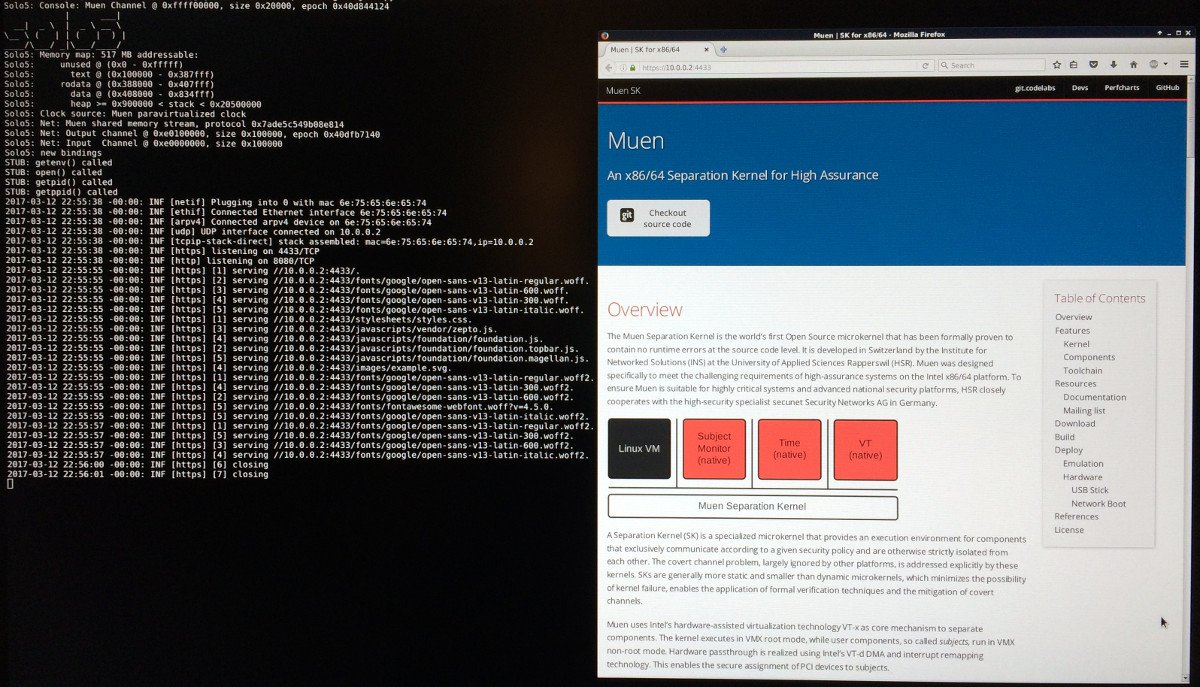
Finally, you can point your browser to https://localhost:4433/ and after
accepting the certificate warnings you should see the static website served by
MirageOS. Congratulations, you have just successfully served yourself a website
via a MirageOS unikernel running on Muen!
When deploying the system to hardware you must direct your browser to the
IP address, which was used to configure the unikernel, e.g.
https://192.168.254.10:4433/.
|
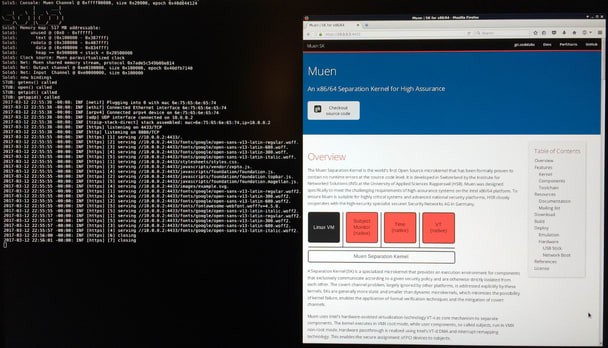
The muen.sk Website
While the previous MirageOS Unikernels article described how to build and deploy MirageOS/Solo5 unikernels as subjects on Muen in general, this article focuses on a practical use-case of the technology.
The muen.sk project website is served by the Unipi MirageOS unikernel running on Muen. Unipi fetches the static website content to serve from a Git repository. The article explains how to build such a system using the Bob Build Tool and Docker images and then deploy it to actual hardware.
System Image Build
The following graph gives an overview of the muen.sk system image build process:

While the unikernel is compiled within the ghcr.io/codelabs-ch/muen-mirageos
Docker container, the Muen system image is built using the Bob Build Tool.
In order to be able to serve the page via the TLS stack provided by MirageOS, up to date SSL/TLS certificates are required. We use Letsencrypt certificates for that purpose.
Therefore, the first step in the build process is to check whether the currently deployed certificates are still valid. This is done using openssl:
openssl x509 -checkend 2592000 -noout -in certs/live/muen.sk/cert.pemThe command checks whether the certificate expires within 30 days. If renewal is required, a new certificate is requested via the standalone feature of the Letsencrypt’s certbot client. The certificate files are then added as content of stage one in the multi-stage Docker build.
The unikernel built inside the Docker container is extracted to the host system, where it is picked up by bob:
FROM ghcr.io/codelabs-ch/muen-mirageos as unikernel
# configure and compile unikernel
Build the Docker image, create a temporary container and copy the resulting
unikernel to the host (unipi for example):
$ docker build -t my-unikernel .
$ docker create --name temp-container my-unikernel
$ docker cp temp-container:/home/opam/unipi/dist/unipi.muen ./unipi.muen
$ docker rm temp-container
Then build the system image with bob:
$ bob dev x86-qemu-solo5-debug -DUNIKERNEL_FILE=${PWD}/unipi.muen
Because we want the target system to only boot cryptographically verified images, the image is signed using the following command (as described by the iPXE homepage):
openssl cms -sign -binary -noattr -in muen.iso -signer $SIGN_CERT \
  -inkey $SIGN_KEY -certfile $CA -outform DER -out $SIG

openssl cms -sign -binary -noattr -in memdisk -signer $SIGN_CERT \
  -inkey $SIGN_KEY -certfile $CA -outform DER -out $SIG
memdisk is a small kernel extracted from syslinux required to reliably boot
the ISO image via HTTP(S). The files and associated signatures are uploaded to
a webserver which is reachable by the target system.
iPXE Image Verification
In order to support image signature verification, the iPXE bootloader must be
compiled with the IMAGE_TRUST_CMD option enabled:
diff --git a/src/config/general.h b/src/config/general.h
index 3c14a2cd..0c67a39d 100644
--- a/src/config/general.h
+++ b/src/config/general.h
@@ -144,7 +144,7 @@ FILE_LICENCE ( GPL2_OR_LATER_OR_UBDL );
 //#define PXE_CMD              /* PXE commands */
 //#define REBOOT_CMD           /* Reboot command */
 //#define POWEROFF_CMD         /* Power off command */
-//#define IMAGE_TRUST_CMD      /* Image trust management commands */
+#define IMAGE_TRUST_CMD        /* Image trust management commands */
 //#define PCI_CMD              /* PCI commands */
 //#define PARAM_CMD            /* Form parameter commands */
 //#define NEIGHBOUR_CMD                /* Neighbour management commands */
The following script instructs iPXE to only boot images which are deemed
trusted (i.e. which have a valid signature). Besides the general networking
setup steps, it fetches the memdisk kernel and the Muen system image
containing our MirageOS webserver subject from a given URL and then verifies
the associated signatures. The imgstat command is for debugging purposes and
displays the current image state before booting the verified Muen system.
#!ipxe

imgtrust --permanent

ifopen net0
set net0/ip 192.168.199.4
set net0/netmask 255.255.255.0
set net0/gateway 192.168.199.1

kernel http://192.168.199.2/memdisk
initrd http://192.168.199.2/muen.iso

imgverify memdisk http://192.168.199.2/memdisk.sig
imgverify muen.iso http://192.168.199.2/muen.iso.sig
imgstat

imgargs memdisk iso raw
boot
The files are signed using a certificate issued by our own private CA. In order
for iPXE to successfully verify such a signature, we need to embed and trust
the appropriate certificates. The CERT and TRUST environment variables can
be used for this:
make bin/ipxe.usb -j5 EMBED=muen.ipxe.website \
  DEBUG=open,x509 \
  CERT=ipxe-sign.crt,ca.crt \
  TRUST=ca.crt
This command compiles a bootable iPXE image which can be dumped onto an USB
stick. The certificates specified via CERT are embedded into the image. Since
embedded certificates are not automatically trusted, our CA must be specified
explicitly via the TRUST option.
Explicit TRUST disables the default trust in well-known CA
certificates. This is important to know if image fetching is intended via
HTTPS. The CA of the webserver certificate must be explicitly added to the
trusted certificates as well (if possible).
|
The DEBUG option is very helpful during initial testing if the image fetching
or signature verification step fails for some reason.
Deployment
The last step of the build process is to trigger a restart of the target system via Intel AMT functionality. The target system restarts and performs the steps depicted in the following graph:

Your minimal, unikernel-based website should now be served at the configured IP after system start.